Protected

Awards


Blog Hop


Stamps I Love


Facebook Badge
Tuesday, January 18, 2011
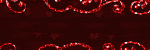
 Pop My Cherry
__.--~~.,-.__ `~-._.-(`-.__`-. \ `~~` .--./ \ /# \ \.--. \ / /# \ '--' \ / '--'Pop My Cherry
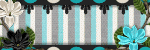
 This tut was written in Photoshop CS5. Any version will work. I assume that you have a working knowledge of PS while using my tuts. Please keep in mind that some keyboard short cuts may be different in other versions.♥♥♥♥♥♥♥♥♥♥♥♥♥♥♥♥♥♥♥♥♥♥♥♥♥♥♥♥♥♥♥♥♥♥♥♥♥Supplies Needed:Scrap Kit:FTU Monti-Cherries-Scrapkit at Monti's Pixel Playground
Tube of choice:I am using Ismael Rac.You can purchase a license at XeracX StoreFont:SummertimeSparkles of choiceMask of choice Plug-ins Needed: Tramages - Mo' jellyfish...♥♥♥♥♥♥♥♥♥♥♥♥♥♥♥♥♥♥♥♥♥♥♥♥♥♥♥♥♥♥♥♥♥♥♥♥♥
~Lets get started~Open a 600x600transparent canvas.Open Monti-Cherry-ScallopedFrame-Red-Green. Move to canvas and center.Open Monti-Cherry-Frame-Green and center at bottom of first frame.Open Monti-Cherry-Paper7. Move under the Monti-Cherry-ScallopedFrame-Red-Green. Resize to fit just over the circle of the frame.Get your magic wand tool and click inside your Monti-Cherry-ScallopedFrame-Red-Green. Highlight the paper7 layer.CTRL + SHIFT + I (letter eye)CTRL + XAdd Tramages - Mo' Jellyfish at these settings to the paper 7.
This tut was written in Photoshop CS5. Any version will work. I assume that you have a working knowledge of PS while using my tuts. Please keep in mind that some keyboard short cuts may be different in other versions.♥♥♥♥♥♥♥♥♥♥♥♥♥♥♥♥♥♥♥♥♥♥♥♥♥♥♥♥♥♥♥♥♥♥♥♥♥Supplies Needed:Scrap Kit:FTU Monti-Cherries-Scrapkit at Monti's Pixel Playground
Tube of choice:I am using Ismael Rac.You can purchase a license at XeracX StoreFont:SummertimeSparkles of choiceMask of choice Plug-ins Needed: Tramages - Mo' jellyfish...♥♥♥♥♥♥♥♥♥♥♥♥♥♥♥♥♥♥♥♥♥♥♥♥♥♥♥♥♥♥♥♥♥♥♥♥♥
~Lets get started~Open a 600x600transparent canvas.Open Monti-Cherry-ScallopedFrame-Red-Green. Move to canvas and center.Open Monti-Cherry-Frame-Green and center at bottom of first frame.Open Monti-Cherry-Paper7. Move under the Monti-Cherry-ScallopedFrame-Red-Green. Resize to fit just over the circle of the frame.Get your magic wand tool and click inside your Monti-Cherry-ScallopedFrame-Red-Green. Highlight the paper7 layer.CTRL + SHIFT + I (letter eye)CTRL + XAdd Tramages - Mo' Jellyfish at these settings to the paper 7. Open Monti-Cherry-Paper1. Move to canvas behind the green three frame. Resize to fit just over the three frames. Use your magic wand tool and click inside the first frame. Hold the shift key and click inside the other two frames.You should now have all three frames with dancing lines.Highlight the cherry paper 1 layer. CTRL + SHIFT + I (letter eye)CTRL + XOpen Monti-Cherry-Blossoms element. Do not resize and position to bottom center of the three frames.Open Monti-Cherry-CherryBlossom element. Do not resize and position to the left under the cherry paper.Duplicate and do EDIT >> TRANSFORM >> FLIP HORIZONTAL and move to the right under cherry paper.Open Monti-Cherry-Cherries-2WithLeaves element. Position on top of the cherry blossoms layer.Move cherry to the left at the top edge of the three frames. Duplicate and move the duplicated cherry under the cherry paper layer. Highlight the original cherry layer.Get your eraser tool and erase the right cherry so that it looks like it is hanging on the frame.Open Monti-Cherry-CherryWithLeaf element. Position on top of the cherry blossom flower and to the right bottom of the frame.Open Monti-Cherry-DelicateFlower element. Do not resize and position behind circle frame and the paper to the left.Duplicate and flip horizontal and move to the right.Open some butterfly elements and add/resize/position to your liking. Open up the red heal tube from Rac and resize to 75.64% Position to the bottom on top of the cherry blossom.Duplicate. On the duplicated tube do FILTER >> BLUR >> GAUSSIAN BLUR set at 2.0. Change the layer style to soft light.Open up the big cherry tube from Rac and position on top of the circle frame. Resize to about 85.07%Duplicate. On the duplicated tube do FILTER >> BLUR >> GAUSSIAN BLUR set at 2.0. Change the layer style to soft light.Use bits and pieces from either tube and put them into the three frames. Do just as you did with putting the paper in there except do one frame at a time.Now do the same you did with the full tubes by duplicating, adding Gaussian blue and change layer style to soft light on each piece of the tube you added to the three frames.Open your sparkles of choice and add where you would like.Add your mask of choice.Add drop shadow to your main tubes and any elements and frames that you wish.Add your name, copyright info and license number.I hope you have enjoyed my tut!

Subscribe to:
Post Comments (Atom)
My Time
Get your own Digital Clock

Networked Blogs
Grab My Blinkie


I CT for

Places I Like


0 comments:
Post a Comment