Protected

Awards


Blog Hop


Stamps I Love


Facebook Badge
Tuesday, May 24, 2011
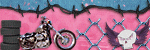
 Orkus Music

This tut was recorded using Photoshop CS5. Any version will work. I assume that you have a working knowledge of PS while using my tuts. Please keep in mind that some keyboard short cuts may be different in other versions.
♥♥♥♥♥♥♥♥♥♥♥♥♥♥♥♥♥♥♥♥♥♥♥♥♥♥♥♥♥♥♥♥♥♥♥♥♥
Supplies Needed:
PTU Abby Dawn kit
from Pimp my tags with scraps
You can get the kit HERE
Template:
none
Tube of choice:
I am using artwork of Orkus Art.
You can purchase his work and license
Font:
Of choice
Masks:
Of choice
Plug-ins Needed:
none
♥♥♥♥♥♥♥♥♥♥♥♥♥♥♥♥♥♥♥♥♥♥♥♥♥♥♥♥♥♥♥♥♥♥♥♥♥
This is my first video tut so I apologize for any interruptions, mess ups, and the camera view. I hope it is still helpful. If you have any questions please feel free to comment here or send me an email at skylerhaylie1431@live.com
Sunday, May 22, 2011
Vintage Pup

This tut was written in Photoshop CS5. Any version will work. I assume that you have a working knowledge of PS while using my tuts. Please keep in mind that some keyboard short cuts may be different in other versions.
♥♥♥♥♥♥♥♥♥♥♥♥♥♥♥♥♥♥♥♥♥♥♥♥♥♥♥♥♥♥♥♥♥♥♥♥♥
Supplies Needed:
PTU Georgetta Cartrite kit
from Wicked Princess Scraps
You can get the kit HERE
Template:
none
Tube of choice:
I am using artwork of Maryline Cazenave.
You can purchase her work and license
Font:
Of choice
Masks:
none
Plug-ins Needed:
none
♥♥♥♥♥♥♥♥♥♥♥♥♥♥♥♥♥♥♥♥♥♥♥♥♥♥♥♥♥♥♥♥♥♥♥♥♥
~Lets get started~
Open 600x600 transparent canvas.
Open the cluster frame and move to canvas.
Scale to about 53.12% center and position to the right a bit.
Go to IMAGE>>ADJUSTMENT>> HUE & SATURATION
Be sure colorize and preview are checked.
Mess with the top and middle sliders to get the color of your choice.
Open the couch element and move to canvas.
Scale to about 64.00% and position to bottom left of frame.
Open the crate element and move to canvas.
Scale to about 41.58% and move under the couch layer. Position to right.
Open the boots element, move to canvas, horizontal flip and scale to about 11.41%
Position to the right of the box.
Open the double lamps element, move to canvas, scale to about 22.16%, and set on top of crate.
Open the single tall lamp element, move to canvas, scale to liking and position behind the boots.
Open and use whatever circle boxes you wish.
Open the water can element, move to canvas, and scale to about 17.19%.
Move to left of couch.
Open the teardrop flower, move to canvas, and scale to about 20.62%
Horizontal flip the flower then move it so that it is up top of the water can. We are going to make the flower look like its stems are in the can.
Now duplicate the flower and move one of the layers under the water can. On the top flower layer take your eraser tool and erase the part of the stem to make it look like the flower is inside the can. As mine shows in final tag.
Do this as many times as you wish with whatever other flowers that you wish.
Open the front view dress element and move to canvas.
We are going to make this into a rug.
Scale it to about 39.22%
Center it however you like and then get your eraser tool and erase the top part only. The bottom part that is below and under the couch etc do not erase, that will be our rug part.
Use your free transform to widen the "rug" to make it the length from the water can to the boots as I have in the final tag.
Open the tall hat box, scale to liking and move behind the couch and crate.
Open the hat, horizontal flip, scale to liking and position on left top of frame.
Open the yucca plant, DO NOT scale, move behind couch on right just like mine on final tag. As you can see it cuts off at the top. Use your eraser tool and erase just enough so you cant tell it has been erased but enough so its not cut off.
Open the drop frame, scale to about 76.05% and position behind square frame.
Open pp7 and scale to just fit over all the squares of the cluster frame.
Get your magic wand too and on the cluster frame layer click inside one of the squares. Hold down the shift key and click in the remaining squares.
SELECT>>MODIFY>>EXPAND by 4
CTRL + SHIFT + I
Highlight your pp7 layer and CTRL + X
Open your tube, scale to liking and position on couch.
Open tube again and do not scale.
Insert into the frame just as we did earlier with the paper.
Add whatever other elements you wish.
Add drop shadow to elements, main tube and cluster frame.
Add your name, copyright, and license number.
I hope you have enjoyed this tut! If you have any questions or would like to send me your results feel free to comment here or email me at skylerhaylie1431@live.com
Subscribe to:
Posts (Atom)
My Time
Get your own Digital Clock

Networked Blogs
Grab My Blinkie


I CT for

Places I Like