Protected

Awards


Blog Hop


Stamps I Love


Facebook Badge
Tuesday, January 18, 2011
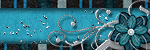
 One Two I'm Coming For You
~One two I'm coming for you~

This tut was written in Photoshop CS5. Any version will work. I assume that you have a working knowledge of PS while using my tuts. Please keep in mind that some keyboard short cuts may be different in other versions.
♥♥♥♥♥♥♥♥♥♥♥♥♥♥♥♥♥♥♥♥♥♥♥♥♥♥♥♥♥♥♥♥♥♥♥♥♥
Supplies Needed:
Nightmare & Nightmare 2 paid kit
by Kristen from Toxic Desirez
Tube of choice. I am using Ismael Rac. You must purchase a license to
use his work. You can do so at XeracX Store
Template One two Im coming for you, by me. You can get it in the supplies HERE
use his work. You can do so at XeracX Store
Template One two Im coming for you, by me. You can get it in the supplies HERE
the mask I used (vix_maskhalloween0905) is in with the rest of my supplies above.
Font of choice. I am using Impervious
Plug-ins Needed:
Tramages ~ Tow the line
♥♥♥♥♥♥♥♥♥♥♥♥♥♥♥♥♥♥♥♥♥♥♥♥♥♥♥♥♥♥♥♥♥♥♥♥♥
~Lets get started~
Open up my tag template
Close off the credits layer.
Highlight the LG black circle layer. Open up paper 1 from nightmare 2 papers or one of your choice.
Click and drag paper over onto your tag template. Move paper layer so it is directly under the big black circle layer.
Resize paper so it just covers the LG black circle. Hold down the control keu (CTRL) on your keyboard and click on the preview window on the LG black circle layer. You now will have dancing lines around it. Now press the CTRL + SHIFT + I (letter eye) keys on your key board all at the same time. You will now have the circle and the outer edge with dancing lines.
It will look like this

Highlight the paper layer and press CTRL + X on your keyboard. The outer parts of the paper that doesn't belong in the circle are now erased. Now move the paper layer above the LG black circle.
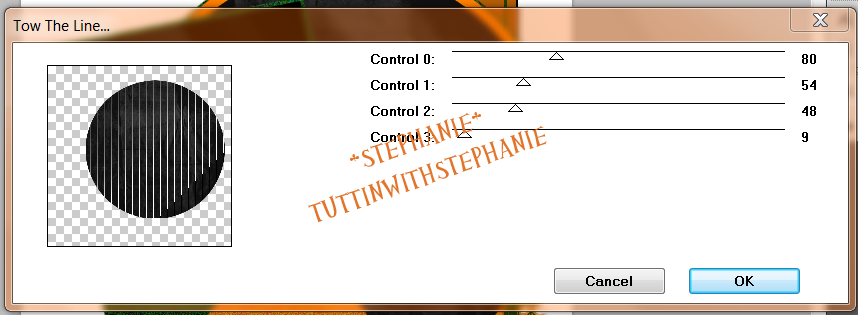
Go to Filter>> Tramages >>Tow the line
put the settings just like this.
Open up paper 15 from nightmare 2.
Drag and drop onto the template. Close out the original paper.
Move paper 15 layer under the black square. Resize until it just covers the black square.
Hold CTRL and click on the preview on the black square layer.
CTRL + SHIFT + I (letter eye)
Highlight the paper layer. CTRL + X
Move the paper layer above the black square layer.
Open up paper 46 from nightmare 2 papers.
Move paper 46 layer under the vertical orange layer. Do the same with that paper as you have done with the other two papers. Refer above on how to do so.
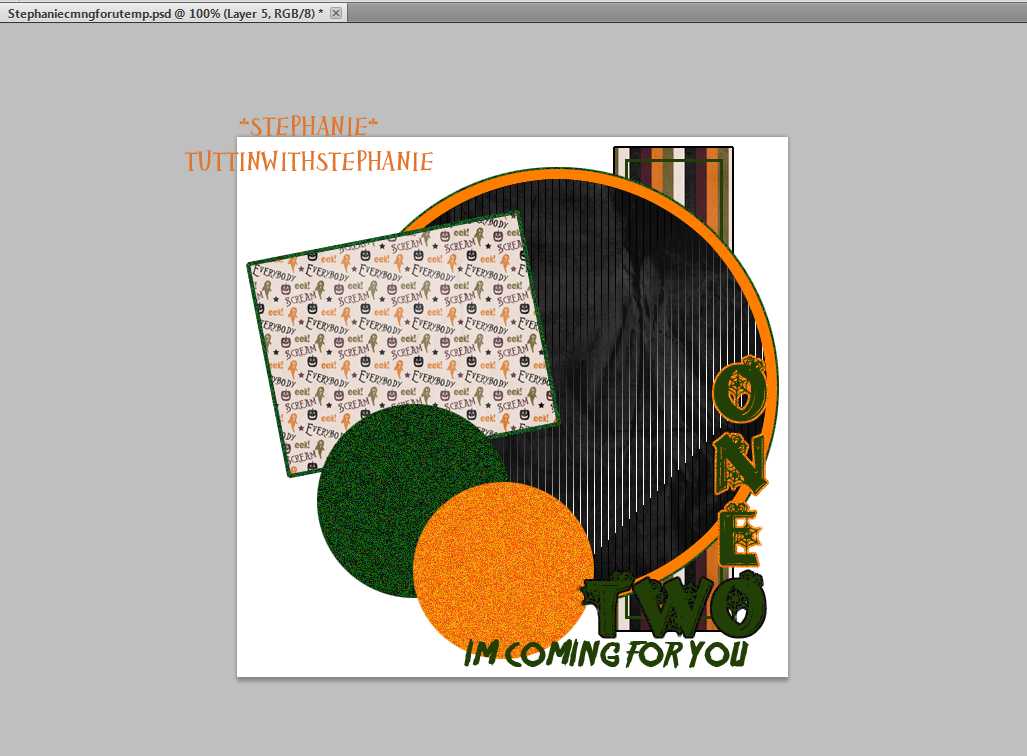
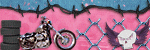
Here is where you should be at, at this point.
Use whatever elements you would like.
I have used:
nightmare bats - resize to liking and position behind green square frame to the right.
nightmare house - position in center of LG black circle and then do the same as you did with the papers so the edges aren't hanging over the circle. Refer above on how to do so. Lower opacity on house to 64% or to your liking.
nightmare moon - resize and move to the right just over the vertical orange rectangle or to your liking.
nightmare tree 2 - resize and position to the right of the squares.
nightmare web - resize and position under the word art two.
nightmare 2 skulls - resize and position just above the im coming wordart to the left of two.
nightmare 2 spider - resize and position on the spider web previously place.
nightmare 2 wire - resize, use free transform if needed to get the right look you want. Position layer under black vertical layer.
Open up tube of choice. preferably a close up to start off.
Drag and drop tube onto the template.
Move this layer just below the square paper layer for now.
Hold CTRL and click on the preview box on the square paper layer.
CTRL + SHIFT + I (letter eye)
Highlight the tube layer and hit CTRL + X
Move your tube layer back on top of the square paper layer.
Duplicate the tube layer.
Filter>>Blur>>Gaussian Blur .... Set the blur at 2.0
Change your layer style on the duplicated blurred layer to soft light.
Open up your close up tube again.
Position it on the green small circle so the face is center.
Edit>>Transform>>Flip Horizontal
Move under the green circle layer.
Hold CTRL and click on the preview box on the small green circle layer.
CTRL + SHIFT + I (letter eye)
Highlight the tube layer and hit CTRL + X
Move tube layer above green circle once again.
Duplicate tube layer and add your Gaussian blur just like above.
Change the duplicated blurred layer style to soft light.
Highlight the original tube layer and change the layer style to Luminosity.
Do this step once again for the orange circle except use a different part of the body.
Open up your fuller body tube and position layer behind the small orange circle. Be sure this layer is also on top of the tree layer. If it isn't move the tree layer so it is positioned right or to your liking. You can leave as is or you can make it so the bottom of the tube looks like it is the shape of the LG black circle.
To do this hold CTRL and click on the preview box of the LG black circle.
CTRL + SHIFT + I (letter eye)
Get your eraser tool and click on the tube layer. Erase the bottom of the tube. This will only erase everything outside the LG black circle.
Select>>Deselect
Duplicate the tube. Add your Gaussian blur just like you did above with the other tubes. Change the duplicated blurred layer style to soft light
Take your cropping tool and crop the whole entire template. That way anything that is left beyond the border is cut out.
Image>>Canvas size
Change the drop down boxes so it says pixels on both.
Change both the width and height to 600.
Go to the white background layer. Change your foreground color to white and get your fill bucket tool. Fill in the white area where we made the canvas bigger. Not a necessary step but it helps.
Now open up your mask I provided in the supplies.
Position this layer above the wire element we placed earlier. Free transform the mask to your liking.
Add drop shadow to anything you like. I have added it to the major parts of the temp, my main tube, the elements and the wordart.
I usually set my shadow at 120* angle, 60-75% opacity, distance 4 or 5, speed 0 and size 4 or 5.
Finally add your name and copyright. Turn the eye off the white layer and save as web and devices. Save as png24. Be sure to save as in psd format as well if you are wanting to go back and edit.
I hope you have enjoyed this tut!

Subscribe to:
Post Comments (Atom)
My Time
Get your own Digital Clock

Networked Blogs
Grab My Blinkie


I CT for

Places I Like


0 comments:
Post a Comment