Protected

Awards


Blog Hop


Stamps I Love


Facebook Badge
Tuesday, January 18, 2011
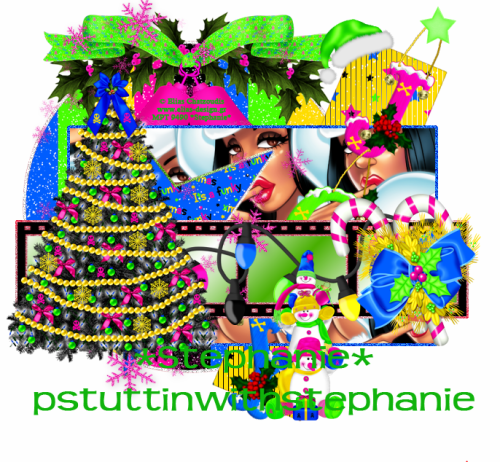
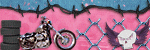
 Funky Christmas
~Funky Christmas~

This tut was written in Photoshop CS5. Any version will work. I assume that you have a working knowledge of PS while using my tuts. Please keep in mind that some keyboard short cuts may be different in other versions.
♥♥♥♥♥♥♥♥♥♥♥♥♥♥♥♥♥♥♥♥♥♥♥♥♥♥♥♥♥♥♥♥♥♥♥♥♥
Supplies Needed:
Tube of choice:
I am using Elias Chatzoudis,
you can purchase his tubes and a license at MPT
Font:
Frosty
Frosty
Plug-ins Needed:
Penta.com - Jeans
Penta.com - Jeans
Tramages - Tow the line
Mura Meister - Copies
♥♥♥♥♥♥♥♥♥♥♥♥♥♥♥♥♥♥♥♥♥♥♥♥♥♥♥♥♥♥♥♥♥♥♥♥♥
~Lets get started~
Open Annu's template. Turn off credits, both word art layers and Raster 11.
Open paper 11 from kit. Scale to fit just over raster 3 layer.
Hold the CTRL key and click on the preview of raster 3 layer.
CTRL + SHIFT + I (letter eye)
Move the paper layer under Raster 2 layer. Press CTRL + X
Move the paper back on top of raster 2.
Right click on Raster 2 layer and select pixels EDIT>> FILL and choose color in the drop down menu then choose white.
Go to FILTER>> NOISE>> ADD NOISE set to your liking.
SELECT>> DESELECT
Open paper 4 and scale to fit just over raster 6 layer .
Hold your CTRL key and click on the preview of raster 6 layer.
CTRL + SHIFT + I (letter eye)
Move the paper 4 under raster 6 layer. CTRL + X
Move the paper back on top of raster 6.
FILTER>> PENTA.COM>> JEANS
FILTER>> PENTA.COM>> JEANS
Settings at 94, 2, 2
Right click and select pixels on Raster 5 EDIT>> FILL and choose color in the drop down menu and choose a blue of choice.
Go to FILTER>> NOISE>> ADD NOISE set to your liking.
SELECT>> DESELECT
Open paper 9 and scale to fit just over raster 4 layer.
Hold the CTRL key and click on the preview of raster 4 layer.
CTRL + SHIFT + I (letter eye)
Move the paper layer under Raster 4 layer. Press CTRL + X
Move the paper back on top of raster 4.
FILTER>> TRAMAGES>> TOW THE LINE
settings at 80, 54. 48, 9
Open paper 1 and do the same as we have above with the other papers except you do it with Raster 8.
Right click and select pixels on raster 7
IMAGE>>ADJUSTMENT>> HUE /SATURATION mess with the sliders to get colors of your liking. I only changed the hue to +106 (colorized UN checked)
SELECT>> DESELECT
Highlight raster 9 layer and go to IMAGE>>ADJUSTMENT>> HUE /SATURATION
Mess with the sliders to get colors of your liking. Again I just changed the Hue to + 106 just like above.
Add whatever elements you would like.I have used
candy cane scaled to about 59.42%
Bells scaled to about 78.01%
Joy, did not scale.
Star scaled to about 18.46%
Tree scaled to about 56.09%
Snowmen scaled to about 42.78%
Snowflakes, did not scale just positioned under the tree.
Hat, EDIT>> TRANSFORM>> HORIZONTAL FLIP scaled to about 41.86% and rotate about 35.66 degrees
Lights scaled to about 74.97%
Open tube of choice (close up) position in center of raster 6 but be sure the layer is on top of the paper that you made out of the raster 6 layer.
FILTER>> MURA'S MEISTER>> COPIES
Put your settings at these
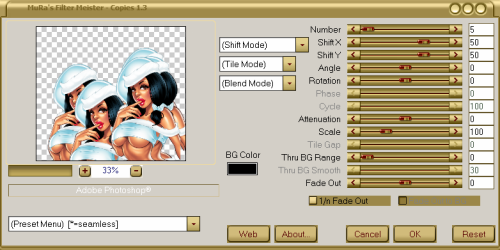
If you need to, duplicate this after adding the copies and move it over to fill the whole rectangle up nicely. Just be sure to merge them together when done.
Now hold CTRL key and click on the preview of the pink paper that you made out of raster 6.
CTRL + SHIFT + I (letter eye)
Be sure you have the tube layer that you we made copy highlighted. and do CTRL + X
You should now have something that looks similar to this..
On your copy tube layer change the layer style to Luminosity.
Open up your full body tube and scale to about 86.19% position to liking.
Duplicate this tube layer and go to FILER>> BLUR>> GAUSSIAN BLUR set at 2.0
Change the layer style to Soft Light. Merge down.
Go to LAYER>> LAYER STYLE>> COLOR OVERLAY
Change the color to a color to match. Then change the BLEND MODE to OVERLAY.
I wound up moving the three little snow men and putting the mistletoe after placing the full body tube.
Add the snow element to your liking.
Add mask of choice.
Add your drop shadow to your main parts of the template, your main tube and any elements you would like.
Finally add your copyright, license number and name.
I hope you enjoyed this tutorial!

Subscribe to:
Post Comments (Atom)
My Time
Get your own Digital Clock

Networked Blogs
Grab My Blinkie


I CT for

Places I Like


0 comments:
Post a Comment