Protected

Awards


Blog Hop


Stamps I Love


Facebook Badge

Saturday, April 16, 2011
 Dream
Dream


This tut was written in Photoshop CS5. Any version will work. I assume that you have a working knowledge of PS while using my tuts. Please keep in mind that some keyboard short cuts may be different in other versions.
♥♥♥♥♥♥♥♥♥♥♥♥♥♥♥♥♥♥♥♥♥♥♥♥♥♥♥♥♥♥♥♥♥♥♥♥♥
Supplies Needed:
PTU Vampire Diaries kit by Polka Dot Scraps
from PMT w/ S
Template:
None
Tube of choice:
I am using artwork of Arthur Crow.
I am using artwork of Arthur Crow.
You must have a license to use his work.
You can purchase his work and license
Font:
Of choice
Masks:
of choice
Plug-ins Needed:XERO - FRITILARYALIEN SKIN XENOFEX 2 - CONSTELLATION
FLAMING PEAR - FLOOD
♥♥♥♥♥♥♥♥♥♥♥♥♥♥♥♥♥♥♥♥♥♥♥♥♥♥♥♥♥♥♥♥♥♥♥♥♥
~Lets get started~
Open a new canvas 600x600.
Open frame three and move to canvas.
Scale to about 89.26% and center it.
Open the scatter element and move to canvas.
Do not scale just position/ duplicate to liking.
Open ribbon 1, move to canvas, and scale to about 73.73%. Position this layer under the scatter elements to the top of the right frame.
Open paper 7, move to canvas, and scale to just cover all of the squares in the frame.
Get your magic wand tool and click inside one of the squares. Hold the SHIFT key and click in the remaining squares.
Go to SELECT>> MODIFY>> EXPAND by 4
CTRL + SHIFT + I
Highlight the paper layer.
CTRL + X
FILTER>> XERO>> FRITILARY
Settings at 5,30,10,0
FILTER>> ALIEN SKIN XENOFEX 2>> CONSTELLATION
settings at 0.03, 3, 5, 1, 100, 82
Twinkle rotation 45, Keep original image
Open swirl 1 element, move to canvas, and scale to just fit the bottom part of the square frames as seen on mine.
Open the crow element, move to canvas, scale to liking and position on top of the swirl one element to the left.
Open your mask of choice. Move this to the very bottom of all the layers.
Position to liking.
Now depending on your mask of choice this may or may not look good on yours.
Go to FILTER>> FLAMING PEAR>> FLOOD
settings at 60, 0, 57, 50, 40, 50, 42, 25, 0, 33, 40
Take a soft brush eraser tool and erase the parts it made that goes over the edges.
You should now have something that looks like this...

Open tube of choice..the close up part. Move to canvas.
Move this layer under the square frames layer. Move it so the face part is showing through the upper right square.
Insert into the frame just as we did earlier with the paper.
Duplicate it now and go to FILTER>> BLUR>> GAUSSIAN BLUR set at 2.0
Change the layer style to soft light.
On the original tube layer change that layer style to Luminosity.
Insert what ever other parts of the tube you would into the rest of the squares.
Be sure to add your blur and change the layer styles just as we did with the first one.
I wound up making the bird a bid smaller in the end.
Add whatever elements you would like.
Add drop shadow to any elements etc you want.
Add your copyright, license number, and name.
I hope you have enjoyed this tut.
If you have any questions please feel free to comment or email me.
Thursday, April 7, 2011
Walking for our Angel baby..
We are struggling this year to meet our donation goal for our walk for March for Babies. Our goal is 300.00 and we aren't even half way near that.
We could really use your help right now. We only have 10 days left, technically 9 because we turn everything in on the 10th day. The walk is April 17th.
If you could please either get the word out or even make just a small donation we would be so grateful! Any little bit helps, even if that means just passing the word around.
Thank you sooo much to those that have already helped, no matter how it may have been, you have no idea how much this means to us!
I also want to send out a even more special thanks to Omneya! She has gone above and beyond to help us get others to donate! <3 ya girl! We owe you big time!
If you would like to help by donating or posting a link for others to help go here
Walking for Riley Renee
Walking for Riley Renee
Again, Thank you all so much for all your help and support!
Thursday, March 24, 2011
AWESOME AWARD!!!

Thank you sooo much to Sarah from Shadows Creations for this wonderful award!
I am not passing it on to my other dear friends!
1st I choose Ka'ipolani from K'Lani's Designs to receive this award.
She is such a great person and has a beautiful blog/tuts!
2nd I choose Punky from Punky Butts Tutorials to receive this award.
She has such a kind heart and makes all sorts of wonderful things on her blog!
3rd but certainly not last I choose Lorna from Lorna's Blog to receive this award.
She has some amazing tuts and such a wonderful person!
Tuesday, March 22, 2011
ATTN FOLLOWERS!!!
I am not sure if you are aware, but if you follow me that entitles you to be an exclusive. Which means that there are special tags that you will receive that the Always list doesn't. Only following does not put you on my always list. Therefor, if you wish to be on there AND receive exclusives please send me a message or comment here with the name you would prefer on the tags so I can add you to the always list.
ALSO, if you are a follower only, please send me an email or comment here with the name you would prefer me to use on the tags. Otherwise, I will just use the name that it shows you are following me by.
Thank you everyone
<3
Monday, March 21, 2011
PICKUPS are ready
All three pickups are ready! Check the directional in the always/followers list PU section to find out where to get them!
If I missed anyone please let me know!
Sunday, March 20, 2011
In My Dreams

This tut was written in Photoshop CS5. Any version will work. I assume that you have a working knowledge of PS while using my tuts. Please keep in mind that some keyboard short cuts may be different in other versions.
♥♥♥♥♥♥♥♥♥♥♥♥♥♥♥♥♥♥♥♥♥♥♥♥♥♥♥♥♥♥♥♥♥♥♥♥♥
Supplies Needed:
PTU In My Dreams kit by Cora's Creations
from PMT w/ S
Template:
None
Tube of choice:
I am using artwork of Elias Chatzoudis.
I am using artwork of Elias Chatzoudis.
You must have a license to use his work.
You can purchase his work and license
Font:
Of choice
I used Saginaw
Masks:
None
Plug-ins Needed:
None
None
♥♥♥♥♥♥♥♥♥♥♥♥♥♥♥♥♥♥♥♥♥♥♥♥♥♥♥♥♥♥♥♥♥♥♥♥♥
~Lets get started~
Open a new transparent template 600x600.
Open frame 01, move to canvas and position to top left of canvas.
Open pp 03 and move to canvas.
Get your magic wand tool and click inside the star frame.
SELECT>> MODIFY>> EXPAND by 4
CTRL + SHIFT + I
Highlight the paper layer.
CTRL + X
Open frame 01 again or duplicate the first one and move to canvas.
Scale to about 68.51% and move to the right of the other star.
Open paper 02 and insert it in the smaller star just as we did with the previous star.
Open frame 01 or duplicate one of the other ones yet again.
Scale to liking and move to bottom of the other two frames.
Insert paper of choice just as we did above with the other two papers.
Open the bed element and move to canvas.
Scale a little bit and position to liking.
Open stars 01 element, move to canvas and position to liking.
Open stars 05 element, move to canvas and center on the stars frames.
Open lights 01, move to canvas, scale/duplicate to liking and position to liking.
Open moon 02, move to canvas, scale to liking and position to the left.
Open the sheep element, move to canvas,
scale to liking, rotate as needed and position near the moon.
Add any other elements that you wish.
Open your tube of choice and move to canvas.
If using same as mine, scale to liking and flip horizontal.
Make her look like she is sitting on the bed.
Duplicate the tube.
FILTER>> BLUR>> GAUSSIAN BLUR set at 2.0
Change the layer style to soft light.
Add drop shadow to your tube and elements.
Crop your canvas as needed.
Add your name, copyright and license number.
I hope you enjoyed this tut. If you have any questions or would like to send your results you can find my email under my blinkies.

Under The Sea

This tut was written in Photoshop CS5. Any version will work. I assume that you have a working knowledge of PS while using my tuts. Please keep in mind that some keyboard short cuts may be different in other versions.
♥♥♥♥♥♥♥♥♥♥♥♥♥♥♥♥♥♥♥♥♥♥♥♥♥♥♥♥♥♥♥♥♥♥♥♥♥
Supplies Needed:
PTU PDS_Under the sea kit by Polka Dot Scraps
from PMT w/ S
Template:
None
Tube of choice:
I am using artwork of Elias Chatzoudis.
I am using artwork of Elias Chatzoudis.
You must have a license to use his work.
You can purchase his work and license
Font:
Of choice
I used The Blue Cabin
Masks:
None
Plug-ins Needed:
None
None
♥♥♥♥♥♥♥♥♥♥♥♥♥♥♥♥♥♥♥♥♥♥♥♥♥♥♥♥♥♥♥♥♥♥♥♥♥
~Lets get started~
Open frame 6.
Image>> Canvas size .. change the drop down boxes to pixels.
Make the height 500 and width 650. We can always crop after we are done if needed.
Open element 9 and move to canvas.
Move this under the frame and scale to just fit over the frame.
Move it so that the waves are lower on the frame leaving some opening at the top.
Something like this...
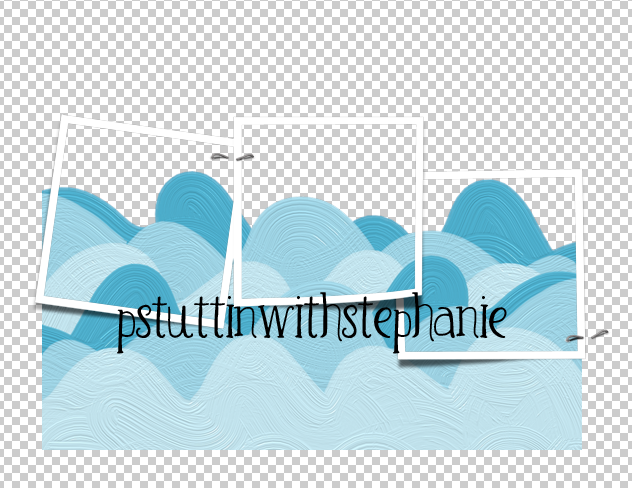
Get your magic wand tool and click inside the first square of the frame.
Hold down the shift key and click in the 2 remaining squares.
SELECT>> MODIFY>> EXPAND by 2
CTRL + SHIFT + I
Highlight the waves layers.
CTRL + X
Open paper 12 and move to canvas.
Move this paper layer under the waves layer. Scale to just fit over the frame if you wish.
Do the same we did with the waves to insert the paper into the frame.
Add some drop shadow to the waves to make it look more 3D. I changed my size to 13 on the shadow to help with the upper shadow effect.
Open element 25 and move to canvas.
Scale to about 53.37% Duplicate as much as you like and resize any of those that you like.
Position to liking.
Open frame 5, move to canvas and scale to about 70.03%
Position under the yellow paper and center it.
Open element 8, move to canvas, scale to liking and position to upper left on the water.
Open element 7, move to canvas, and scale to about 18.91% and position to liking.
Open element 6, move to canvas, scale to about 18.58% and position to liking.
Open element 2, move to canvas, scale to about 14.65% and position to liking.
Open element 1, move to canvas, scale to liking and position on the first square of frame to the bottom left.
Open element 12, move to canvas and position under yellow paper but above the frame 5 layer.
Erase anything that shows at the bottom.
Duplicate and horizontal flip and move to the other side.
Add your tube of choice. Duplicate the tube.
FILTER>> BLUR>> GAUSSIAN BLUR set at 2.0
Change the layer style to soft light.
Add drop shadow to your elements, tube and anything else you wish.
Add your name, copyright info and license number.
I hope you enjoyed this tut! If you have any questions or would like to send me your results you can find my email addy under my blinkies.
Baahh Baahh

This tut was written in Photoshop CS5. Any version will work. I assume that you have a working knowledge of PS while using my tuts. Please keep in mind that some keyboard short cuts may be different in other versions.
♥♥♥♥♥♥♥♥♥♥♥♥♥♥♥♥♥♥♥♥♥♥♥♥♥♥♥♥♥♥♥♥♥♥♥♥♥
Supplies Needed:
PTU tk-Bopeep kit by Tammykat
from PMT w/ S
Template:
#3 by Sylvie at Eye Candii Graphicz
Tube of choice:
I am using artwork of Keith Garvey.
I am using artwork of Keith Garvey.
You must have a license to use his work.
You can purchase his work and license
Font:
Of choice
I used Waterfalls
Masks:
Of choice
Plug-ins Needed:
Xero-Fritillary
Xero-Fritillary
♥♥♥♥♥♥♥♥♥♥♥♥♥♥♥♥♥♥♥♥♥♥♥♥♥♥♥♥♥♥♥♥♥♥♥♥♥
~Lets get started~
Open template and turn the eye off or delete the credits layer.
Open clouds paper from kit and move to canvas.
Move this layer under the pink rectangle layer.
Scale the paper until it just fits over the pink rectangle.
CTRL + click on the preview window of the pink rectangle layer.
CTRL + SHIFT + I
Be sure your paper layer is highlighted.
CTRL + X
Move the paper layer on top of the pink rectangle layer.
Open the bluedotpaper1 and move to canvas.
Move this paper layer under the large pink fritillary layer.
Do the same as we just did with the cloud layer paper except make it to just fit the large pink fritillary layer.
Add Xero-Fritillary to this paper.
Settings at...
Granularity - 6
Aggression - 159
Tesselation - 27
Variation - 26
Feel free to change any of these to your liking.
Open the blue sheep paper and move to canvas.
Move this layer under the small pink rectangle fritillary layer.
Do again as we did with the other papers except make it to just go over the small pink rectangle fritillary layer.
Add your fritillary at the same settings above.
On the small pink dotted layer change the color to a blue matching the kit.
You can do so by going to IMAGE>> Adjustments>> HUE/SATURATION
My settings are -133, +100, 0
Change ONLY the hue to -133 on the following layers; small gradient rectangle and 3 gradient rectangles.
Open the acrylic frame1 and move to canvas.
Scale to about 67.33% then free transform
then sides to make it match the black circle layer.
Move the frame and black circle down if needed.
You should now have something that looks like this...

Open sheepfront1 and move to canvas.
Scale to liking and position to right bottom.
Open sheep2, move to canvas and scale to liking. Position near other sheep.
Open butterfly and move to canvas.
Scale to about 26.33% and position to bottom left of circle frame.
Open fence, move to canvas and scale to about 43.92%.
Position to bottom right under sheep.
Open blue bow, move to canvas, do not scale and position on bottom left corner of the middle rectangle.
Open any of the cloud elements you like, scale and position to liking.
Open blue ribbon with bell and position to liking. I do not scale just erased whatever hung off the edges.
Open tube of choice and move to canvas.
If your using the same tube as me, crop your whole tag(making sure that nothing is touching the edges) then go to image>>canvas size and make the height bigger.
Center everything now that your canvas is bigger. Move tube so it looks like her knees are sitting on the bottom of the small black rectangle frame.
Duplicate the tube.
FILTER>> BLUR>> GAUSSIAN BLUR set at 2.0
Change the layer style to Soft light.
Open a closeup and move to canvas.
Insert any parts of the body you wish into the 3 rectangles.
You can do this just like we did with the papers above.
Duplicate any parts of the tube you do and add Gaussian blur and change the layer style to soft light just like above.
Then change the bottom layer of that tube to luminosity.
Add a close up of the face into the small gradient rectangle and do the same with this tube as we did above with the blur, soft light and luminosity.
Add whatever you like into the black circle.
Add your mask of choice.
Add your Baah Baahh text anyway you like.
Add drop shadow to any elements, main parts of temp and main tube.
Add your name, copyright info and license number.
I hope you have enjoyed this tut! If there is anything you need help with or would like to send me your results, you can get my email on the right under my blinkies.
Saturday, March 19, 2011
Forgive me!!
Please forgive me for my lacking! I have been super busy with school and rl lately. School pretty much takes up whatever extra time I have. I am gonna work on some tuts this evening/tomorrow and hope that I can put out more than one. Please keep a look out for them and watch for pickups. I will make them available for followers and always list to make up for me not doing much!
Subscribe to:
Posts (Atom)
My Time
Get your own Digital Clock

Networked Blogs

Grab My Blinkie


I CT for


Places I Like


