Protected

Awards


Blog Hop


Stamps I Love


Facebook Badge
Sunday, January 23, 2011
 Don't forget about the giveaway!!
Remember if you invite someone and they click follow you both will be entered into the drawing for an MPT gift card. YOU BOTH must send me an email saying who invited you/who you invited. You must also include your full name, email and mpt license numbers.
Come on and lets see some entries!!
*Check the Giveaways section on the directional for full rules*
*Check the Giveaways section on the directional for full rules*
Kat Eyes (animated)


This tut was written in Photoshop CS5. Any version will work. I assume that you have a working knowledge of PS while using my tuts. Please keep in mind that some keyboard short cuts may be different in other versions.
♥♥♥♥♥♥♥♥♥♥♥♥♥♥♥♥♥♥♥♥♥♥♥♥♥♥♥♥♥♥♥♥♥♥♥♥♥
Supplies Needed:
PTU Girlie Girl kit
Template:
None
None
Tube of choice:
I am using artwork of Maxine Gadd (this is a FTU tube)
You still must have a license to use.
You can get it at Mypsptubes
Font:
Ohmygodstars
Bling/s of choice:
(I can not provide the one I have used)
(I can not provide the one I have used)
Plug-ins Needed:
MuRa Meister - Copies(optional)
MuRa Meister - Copies(optional)
♥♥♥♥♥♥♥♥♥♥♥♥♥♥♥♥♥♥♥♥♥♥♥♥♥♥♥♥♥♥♥♥♥♥♥♥♥
~Lets get started~
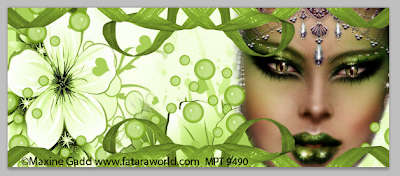
Open a new canvas 600x250
Open el18 from the scrap kit. Move to canvas and move it to the top left corner.
Duplicate and horizontal flip and move that one to the top right corner. Move the duplicated layer under the original layer.
Merge this two layers together and duplicate. Flip vertical and move to bottom.
It should look something like this...


~Lets get started~
Open a new canvas 600x250
Open el18 from the scrap kit. Move to canvas and move it to the top left corner.
Duplicate and horizontal flip and move that one to the top right corner. Move the duplicated layer under the original layer.
Merge this two layers together and duplicate. Flip vertical and move to bottom.
It should look something like this...

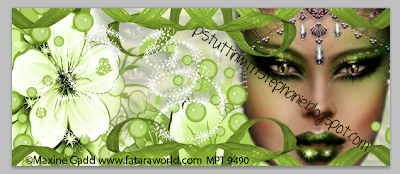
Open up pp25 paper and move to canvas.
Move this layer underneath the two ribbon layers. Do not resize just position so that the big flower is centered on the left of the ribbons.
Something like this....
Duplicate this paper layer and move so that the big flower is at the bottom of the ribbons. Make it so only two petals are showing and use a soft eraser brush and erase what covers up the left flower we places earlier.
It should look something like this...

Open up tube, move to canvas and scale to about 77.15%
Move to right side almost all the way to her eye.
Something like this...

Use a soft brush and start erasing on the edges of the tube so it blends more.
Something like this...

Duplicate this tube and do FILTER>>BLUR>>GAUSSIAN BLUR set at 2.0
Change the layer styler on the duplicated layer to soft light.
Open el76 and rotate to -71.01 degree. Position to liking.
Open el128, move to canvas and scale to about 33.51%.
Duplicate as much as you like, flip is needed and position to liking.
I wound up going back and using a soft brush and erasing the other bottom black part of the tube as well.. getting something like this..

I also felt that she needed to be rotated a bit. So do so to your liking.
Duplicate this tube layer once again and erase everything but her eyes.
Duplicate her eyes many times and position them here and there.
(you may also use MuRa meister copies for this but I felt it gave a better look for me to move and position and erase what i wanted to)
Something like this...

Merge all the eye layers together and change the opacity to about 27% or to liking. Erase whatever you feel u need to after changing the opacity. I erased parts that covered alot of the bottom and left flowers.
I then duplicated the eyes layer and moved it over to the right behind the main tube to fill up that little white space.

Open your bling of choice. If you happen to have the one I am using then highlight all the layers and rotate to about 28.89 degree.
Duplicate and turn all the eyes on on the duplicated ones. Then horizontal flip.
Move the duplicated one to the right some. Turn the eyes back off the duplicated ones except the first one.
Should now look something like this...
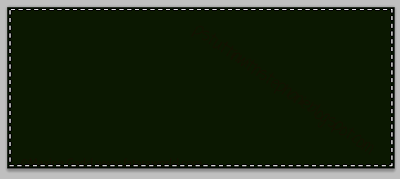
Now make a new layer at the very top of all the other layers.
Fill it with black or a dark green.
Take your rectangle marquee tool and cut out the middle to make a border like this...

CTRL + X to cut that out.
EDIT>> STROKE ... width set at 1px..change the color to a light green from the flowers... change the location to outside..leave the rest alone.
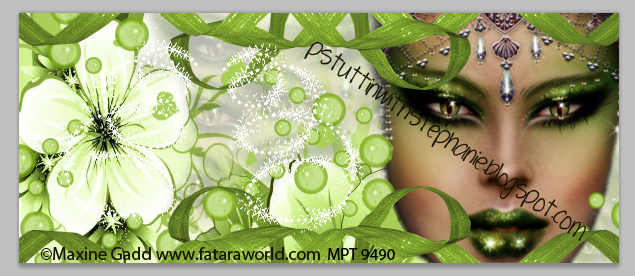
Add your copyright info and license number.
Add your name in the center of the blings we added earlier.
~Time to animate~
WINDOW>>ANIMATION
Be sure you are on animation frames tab.
Go to your blings layers and be sure the eyes are on for both sets of blings on the first layer.
Add another frame and turn the eyes off the first layer of both blings.
Turn on the eyes of the second layer of both blings.
Add another frame layer. Turn the eyes off the second layer of both blings.
Turn the eyes on on the third layer of both blings. Continue in this pattern until you get all the layers of both blings done.
You should have 10 frames when you are done with that.
Highlight all the frames and click the little black arrow on an frame to change the speed. Set it to 0.1.
Be sure that in the bottom left corner it says forever. If it doesn't change it.
Press the play button to see if it is to your liking. You may change the speed if you wish.
Save for web & devices as GIF
Close the animation window.
~Time for the avatar~
Open a new 150x150 canvas.
Highlight all your layers from your siggy we did above except the border, text, blings and main tube layers.
Move the ones we highlighted over onto your avatar canvas.
Scale if you like and move to however you want it to look.
Now move your main tube over onto this canvas from your previous canvas.
Scale to liking and move so only the left eye shows.
Move the eye layers if need be.
Add a new layer on top of all the other layers and add a border just as we did with the siggie.
Add you copyright and license number.
Add your initials.
We are all done...I hope you enjoyed this tut!
Subscribe to:
Posts (Atom)
My Time
Get your own Digital Clock

Networked Blogs
Grab My Blinkie


I CT for

Places I Like